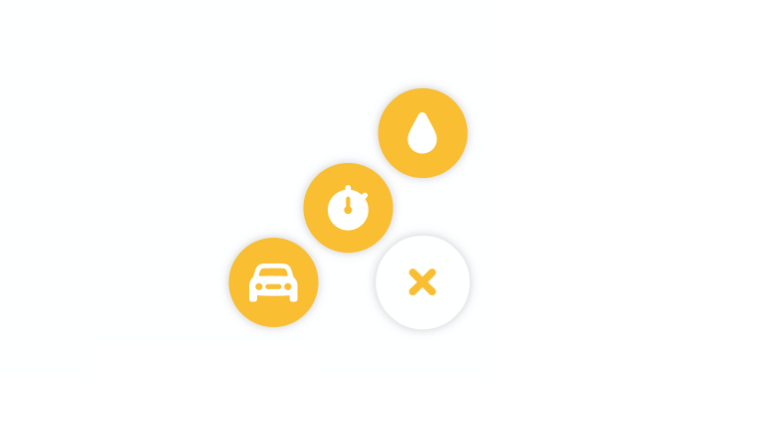
前回に引き続き、タップで絵ニューが開閉するメニューボタンの実装例を記載します。
今回は、ボタンを右下に配置し、タップすると、順番にアニメーションでメニューが3つ左・左・上に表示されるようにしてみます。
コードの詳細は、前回の記事に記載しているので、今回の記事では、相違点のみを記載しています。ぜひ、前回の記事も参考にしてみてください。
ExpandButtonのアニメーション
前回との相違点としては、アニメーションが横に表示されるのではなく、左・左上・真上とTranslateする位置が異なる部分です。今回は、ボタンが3つとの決め打ちで、それぞれの位置をtranslationXとtranslationYで指定しています。
func updateViews() {
        menuButton.isSelected = !menuButton.isSelected

        switch isExpanded {
        case true:
            guard let buttons = self.actionButtons else { return }
            UIView.animate(eachBlockDuration: 0.2, usingSpringWithDamping: 0.5, initialSpringVelocity: 0.5, eachBlockOptions: .curveEaseInOut, animationBlocks: {
                buttons[X].alpha = 1.0
                buttons[X].isEnabled = true
                buttons[X].transform = CGAffineTransform(translationX: -100, y: 0)
          },
          {
                buttons[X].alpha = 1.0
                buttons[X].isEnabled = true
                buttons[X].transform = CGAffineTransform(translationX: -50, y: -50)
          },
          {
                buttons[X].alpha = 1.0
                buttons[X].isEnabled = true
                buttons[X].transform = CGAffineTransform(translationX: 0, y: -100)
          })

        case false:
            guard let buttons = self.actionButtons else { return }
            UIView.animate(withDuration: 0.3, delay: 0, usingSpringWithDamping: 0.75, initialSpringVelocity: 1.0, options: .curveEaseInOut) {
                buttons.forEach {
                    $0.alpha = 0.0
                   $0.isEnabled = false
                   $0.transform = .identity
                }
            }
        }
}
アニメーションブロック
一つのアニメーションが終了したら次のアニメーションを開始する、というふうに、アニメーションを順番に実行させるために、UIViewのアニメーションのExtensionを追加しています。
import UIKit

private extension ArraySlice {
    var startItem: Element {
        return self[self.startIndex]
    }
}

extension UIView {
    public static func animate(eachBlockDuration duration: TimeInterval, eachBlockDelay delay: TimeInterval = 0, usingSpringWithDamping: CGFloat, initialSpringVelocity: CGFloat, eachBlockOptions options: UIView.AnimationOptions = .curveEaseInOut, animationBlocks: (() -> Void)..., completion: ((_ finished: Bool) -> Void)? = nil) {
        let isFinished = animationBlocks.isEmpty
        if isFinished {
            completion?(isFinished)
        } else {
            let animationArraySlice = ArraySlice(animationBlocks)
            UIView.animate(eachBlockDuration: duration, eachBlockDelay: delay, usingSpringWithDamping: usingSpringWithDamping, initialSpringVelocity: initialSpringVelocity, eachBlockOptions: options, animationArraySlice: animationArraySlice, completion: completion)
        }
    }

    private static func animate(eachBlockDuration duration: TimeInterval, eachBlockDelay delay: TimeInterval, usingSpringWithDamping: CGFloat, initialSpringVelocity: CGFloat, eachBlockOptions options: UIView.AnimationOptions, animationArraySlice: ArraySlice<() -> Void>, completion: ((_ finished: Bool) -> Void)?) {
        let animation = animationArraySlice.startItem

        UIView.animate(withDuration: duration, delay: delay, usingSpringWithDamping: usingSpringWithDamping, initialSpringVelocity: initialSpringVelocity, options: options, animations: animation) { (finished) in
            let remainedAnimations = animationArraySlice.dropFirst()
            if remainedAnimations.isEmpty {
                completion?(finished)
            } else {
                UIView.animate(eachBlockDuration: duration, eachBlockDelay: delay, usingSpringWithDamping: usingSpringWithDamping, initialSpringVelocity: initialSpringVelocity, eachBlockOptions: options, animationArraySlice: remainedAnimations, completion: completion)
            }
        }
    }
}
こちらの記事を参考にすこし修正を加えました。
https://qiita.com/lovee/items/460cbb02a345e0ff7910
UIViewControllerでのExpandButtonの配置
AutoLyaoutの設定において、高さを160に設定します。
この160とは、ボタンの高さ60に加えて、真上に移動するボタンの移動量100を加味した数値になります。このExpandButtonの高さを設定しておかないと、ボタンを開いたときに、真上に移動したボタンのタップが検知しなくなってしまいます。
expandButton.snp.makeConstraints {
        $0.height.equalTo(160)
        $0.leading.equalToSuperview().offset(16)
        $0.trailing.equalToSuperview().offset(-16)
        $0.bottom.equalToSuperview().offset(-32)
}実際にアプリに組み込む際には、ExpandButtonの裏側に様々なビューが配置されることになります。今回は検証していませんが、裏側のビューのタップや、メニューボタンを開いた時のタップなど、諸々追加で確認・修正が必要になると思います。
以上です。
ココナラというサービスをご存知ですか?
ココナラは、プログラミングやウェブ制作、デザインなどの専門知識を持つ人たちが、自分のスキルを活かしてサービスを提供する場所です。
初学者の方でも気軽に相談できるため、自分のスキルアップにも最適です。また、自分自身もココナラでサービスを提供することができ、収入を得ることができます。
ぜひ、ココナラに会員登録して、新しい世界を体験してみましょう!


